How to Create a SSH Tunnel to a Plex Server Using Putty?
If you need to claim your Plex server from a Windows machine not on the same network as the server, then you will need to create a SSH tunnel into the server. After establishing the SSH tunnel, you will be able to connect to the local Web App from the machine just like you would if the machine and server were on the same network.
For Windows, the easiest way to create a SSH tunnel to another system is to use Putty.

Creating the SSH Tunnel
The steps below outline how to create a SSH tunnel to your Plex server. There are a few prerequisites that will need to be completed before following the steps:
- The SSH server is running on your Plex server machine.
- A public/private keypair has been created, with the public key associated with the SSH account on the server. Using a keypair is more secure than using a user ID and password, so the steps below will be using the keypair for authentication.
To create a SSH tunnel, use the following steps:
- Open the Putty application on the machine you will use to connect to the Plex server. The Sessions will be displayed.
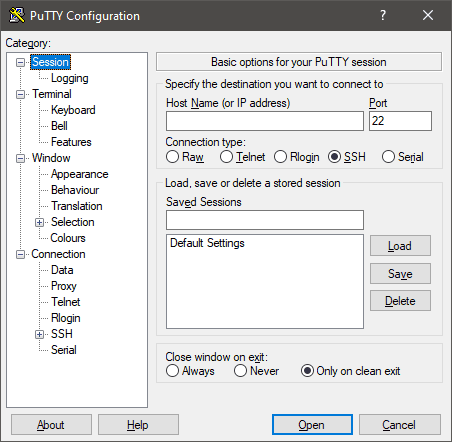
Putty startup - In the Host Name (or IP address) field, enter the name of the server, or the IP address. Keep the default port of 22, unless it was changed on the server to a different port.
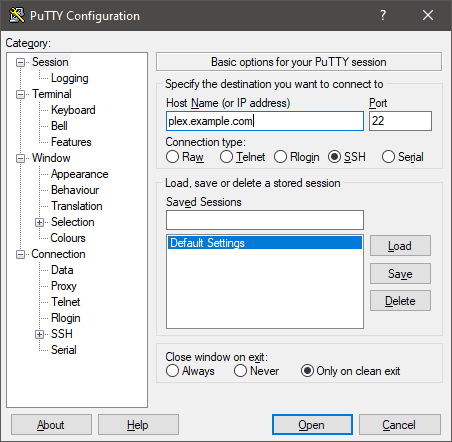
Plex server name and port specified - In the Saved Sessions section, enter a name for the session, and then click the Save button.
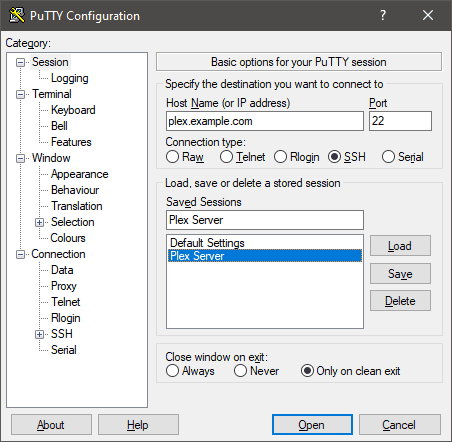
Plex session saved in Putty - Next, we will establish the connection to the server using the private key. The public key should have been setup on the server before hand to establish a connection. On the left, navigate to Connection->SSH-Auth then enter the location of the private key in the Private key file for authentication field.
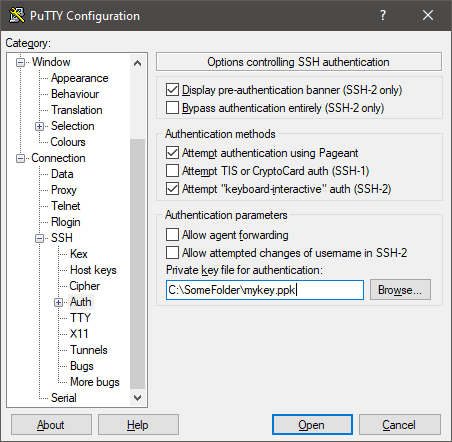
SSH authentication using a private key - Next, navigate to Connection->SSH->Tunnels.
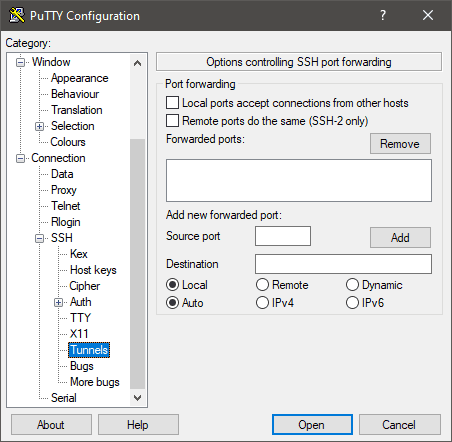
SSH tunnels configuration - In the tunnel options, enter the following:
- Source port: 8888
- Destination: 127.0.0.1:32400
Click the Add button to add the tunnel configuration to the list of forwarded ports.
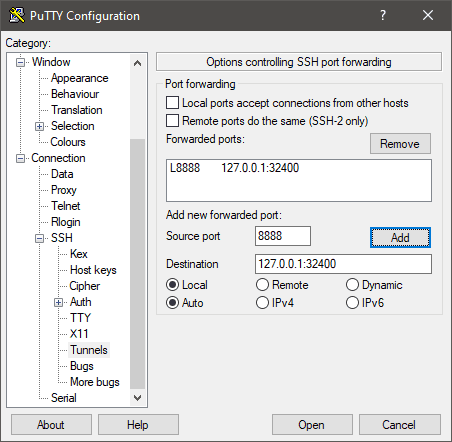
Plex forwarded port from 8888 to 32400 - From the options on the left, scroll to the top and click the Session option to return to the sessions window. Click the name of your Plex session in the Saved Sessions list, and then click the Save button to save all the settings you have just modified.
Now that the settings to create the SSH tunnel have been set and stored in a Putty session, you can now launch the SSH session and connect to your Plex server Web app.
Connect to the Plex Local Web App through the SSH tunnel
To connect to the Plex Web App using the SSH tunnel, do the following:
- Open Putty, and then click on the Plex session in the Saved Sessions list and click the Load button.
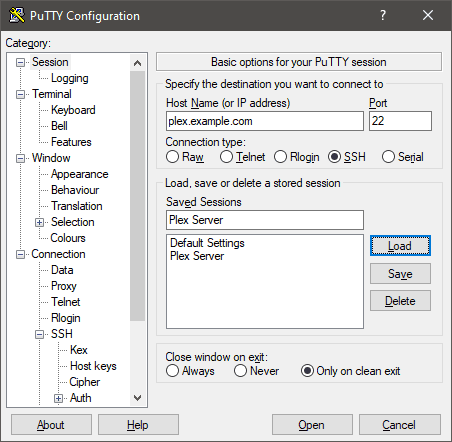
Loaded Plex session in Putty - Click the Open button to launch the SSH session. This SSH window will need to remain open to keep the tunnel alive.
- Once the SSH tunnel has been established, open your Web browser and navigate to
http://127.0.0.1:8888/web. This will now cause the browser to connect to the Plex Web App on the server as if it were local to your machine.