How to Rip Blu-ray Discs to Stream from Plex
Plex is the main way in which my family and I view our collection of Blu-ray movies and DVD discs. Each time I get a new Blu-ray disc, I immediately rip it and encode it so it can be streamed from my Plex media server. This allows me to then put away the disc for safekeeping. This was important as I had young kids that have left discs lying around to get scratched, or bitten, which prevented the discs from working.
The information below presents step-by-step instructions that I use to rip both my Blu-ray and DVD discs. The end result is a high-quality video file that can be streamed by my Plex server.

Table of contents
Requirements
There are not a lot of requirements for ripping Blu-ray discs and encoding the movies so they can be streamed from Plex. In fact, the entire process requires only a Blu-ray reader and three applications, with one of the applications being optional.
Hardware
Any PC or Mac manufactured in the last 10 years can be used for both ripping a Blu-ray as well as encoding the file into a smaller, more usable format for Plex. The main requirement, however, is that the system must contain a Blu-ray reader. Either an internal or external Blu-ray reader will work.
For an internal Blu-ray reader I recommend the LG WH16NS60 and for an external reader the recommended model is the Buffalo BRUHD-PU3-BK.
Software
The following software will be used to rip the Blu-ray discs and encode and compress the movie files:
- MakeMKV
- This application runs on either Windows or Mac OS, and can easily extract the Blu-ray contents into an MKV file. This application will be used to rip the Blu-ray disc to produce a high-quality copy of the movie. MakeMKV is free while in beta, but if you like using the software, I highly recommend you purchase it.
- Handbrake
- Handbrake is probably the most popular application for encoding and compressing movie files from one format to another. We will use this application to compress the MKV file produced by MakeMKV to make it smaller and easier to stream from Plex. Handbrake is free.
- MediaInfo
- This software is optional, but I use it to display information about the movie files created by both the MakeMKV and Handbrake software. I usually download the non-installer version and just extract it to the machine I use for encoding my movies with Handbrake.
Before moving to the next section, you should download and install the software.
Ripping a disc with MakeMKV
The first step in the process of streaming your Blu-rays from Plex is to rip the video and audio content from the disc to your computer. This is accomplished easily with MakeMKV and using the following steps:
- Place the Blu-ray disc in the reader, and then open MakeMKV. MakeMKV will read the specified drive and display information about the Blu-ray disc. Click the large drive/disc image to continue.
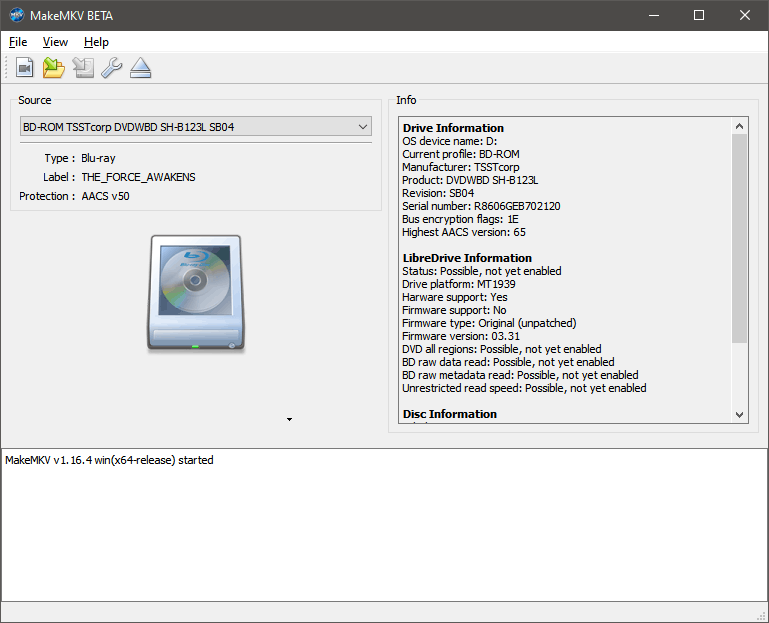
The MakeMKV start window showing the source drive selection - At this point, MakeMKV will take some time to read the structure of the movie on the disc. Once it is done, you will see the structure displayed in the upper-left corner of the window in a tree structure list. Right-click on a blank area in the tree structure and click Unselect all from the menu. This will uncheck all items in the list.
- Click the box beside the main movie item in the list. The movie item is easy to see as it will be the largest item in terms of disc space. The disc space used for each item is displayed on the far right of the item (you may need to expand the size of the list if it doesn't show).
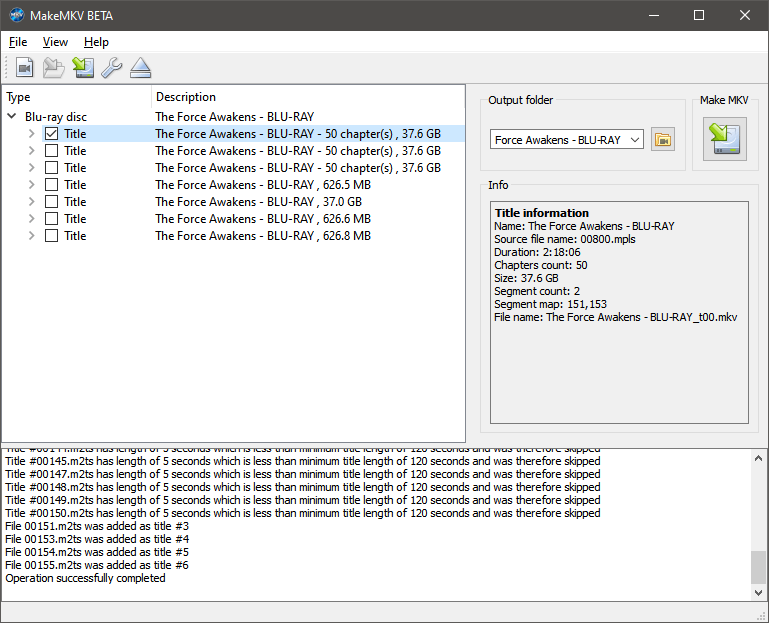
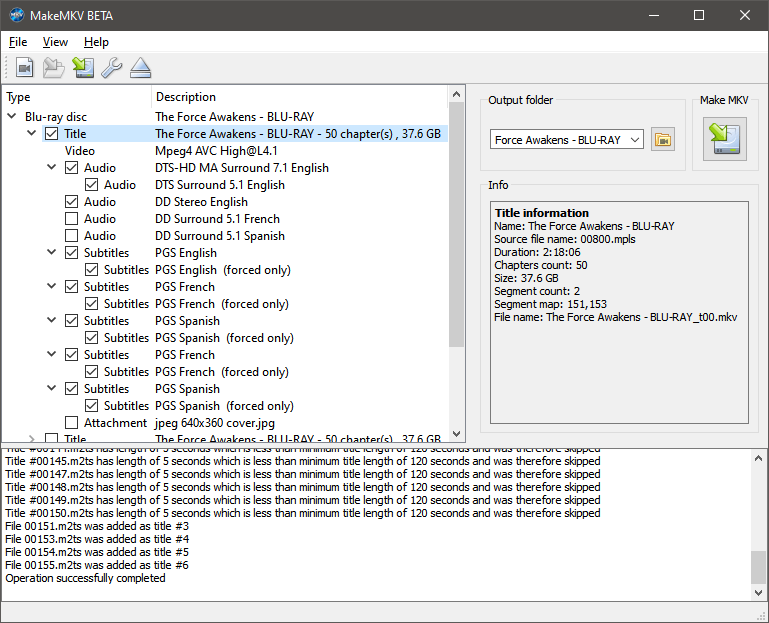
The movie item selected in MakeMKV - Expand the selected movie item and you will see the various video and audio streams, as well as the subtitles. At this point, you can select specific streams to include in the MKV file that will be produced. Since I am interested in the English audio stream only, I will unselect the audio streams for the other languages. You can unselect the audio you won't need to save some space, but in the end, it won't matter too much. I usually just keep all the subtitles as they don't use too much space.
Selecting the individual movie streams to be ripped in MakeMKV - Specify the folder where you would like to output the MKV file and then click the Make MKV button beside the output folder. At this point, MakeMKV will read the disc and extract the move information from the disc and save it to the folder you specified. This will take some time to do, as the reading and saving are dependent on the speed of your Blu-ray reader.
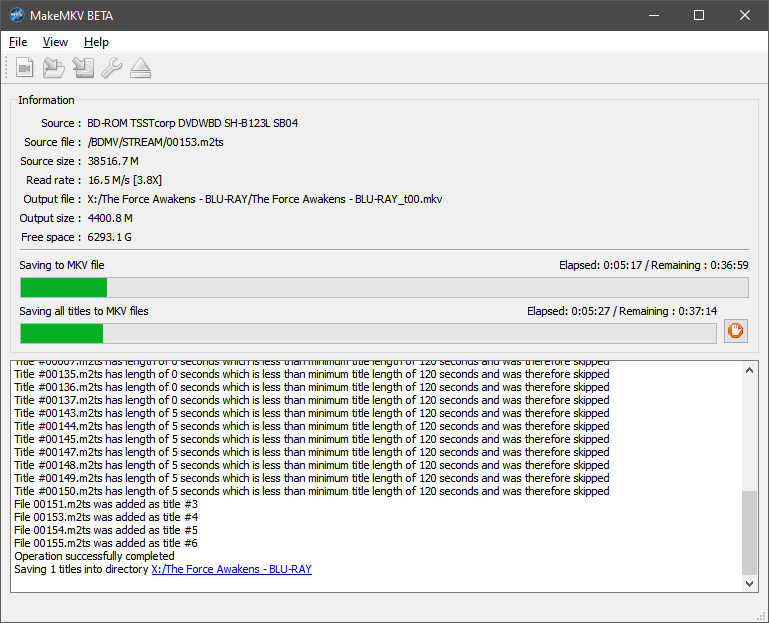
Ripping the movie and saving it to a file
At this point, you should now have an almost exact duplicate of the Blu-ray movie from the disc on your system in an MKV container. While you can stream this file from Plex as is, many devices, or network connections, may not be able to play such a large file without transcoding. In addition, the MKV file is also large - 30 to 50 GB in size depending on the movie.
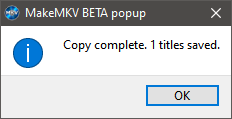
To reduce the size of the file, and make it more compatible with streaming devices to allow Plex to direct play the movie, you will need to encode and compress the file. The next section will walk you through that process.
Encoding with Handbrake
Handbrake is the most popular application used to compress video files. It has many options that can be used to encode movie files from one format to another. In this case, we will use it to compress the MKV file from MakeMKV into a much smaller file, while also keeping as much quality as possible.
With that in mind, and with the MKV file created from the previous section, let's create a video file that can be streamed from Plex.
- Run Handbrake, and then select the File - Open a single video file option and then select the video file you would like to encode and compress.
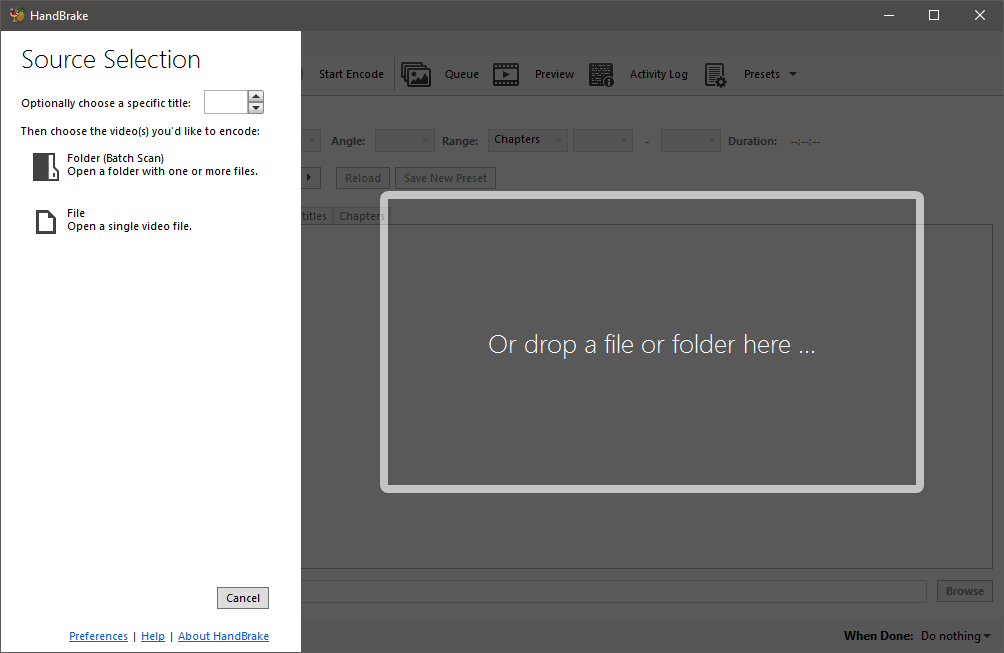
Handbrake at the source selection windows - On the Summary tab, select MP4 from the Format drop-down box and then check the Web Optimized checkbox.
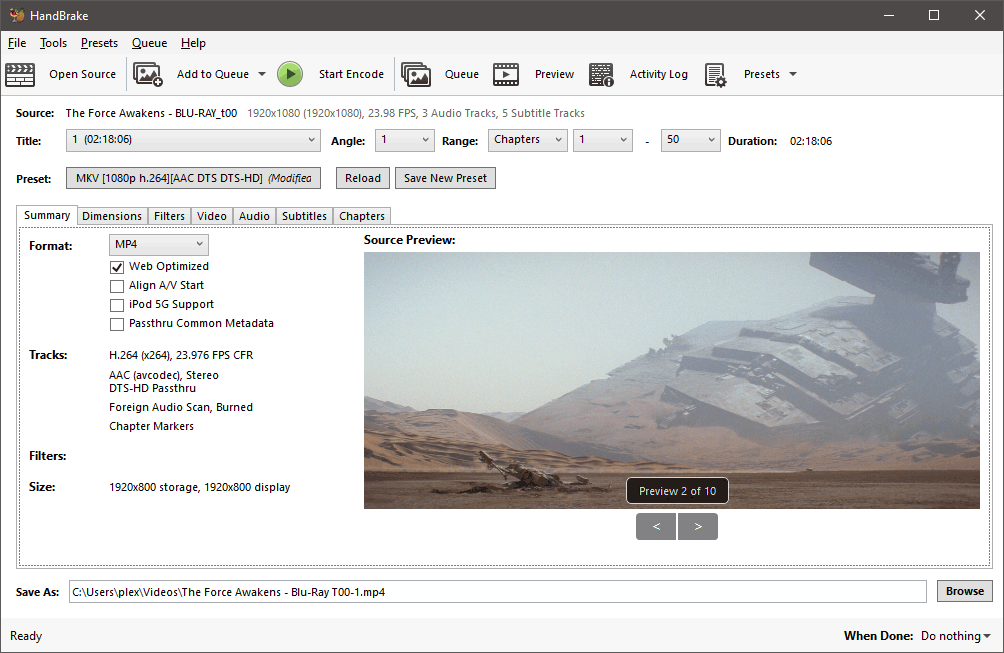
Handbrake Summary tab settings - On the Dimensions tab, set the following:
Dimensions tab settings Settings Value Notes Anamorphic Automatic Don't change any size/scaling as the Anamorphic settings will handle the sizing. Cropping Automatic 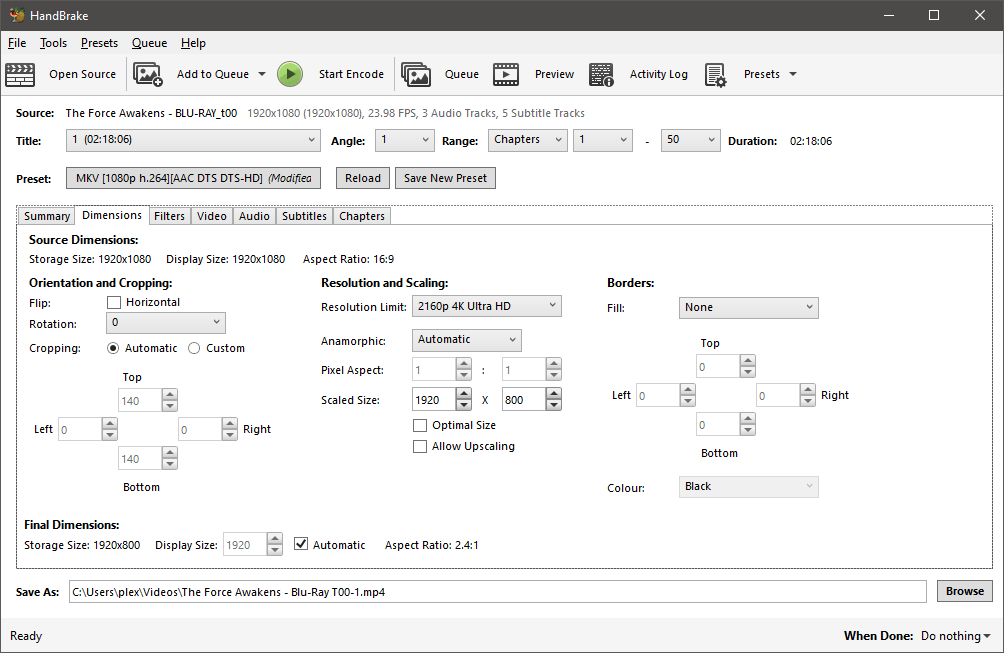
Handbrake Dimensions tab settings - On the Filters tab, set the following:
Filters tab settings Settings Value Notes Detelecine Off Interlace Detection Off If you know your video is interlaced, then set this value to Default Deinterlace Off If you know your video is interlaced, then set this value to Decomb Denoise Off Chroma Smooth Off Sharpen Off Deblock Off Colourspace Off 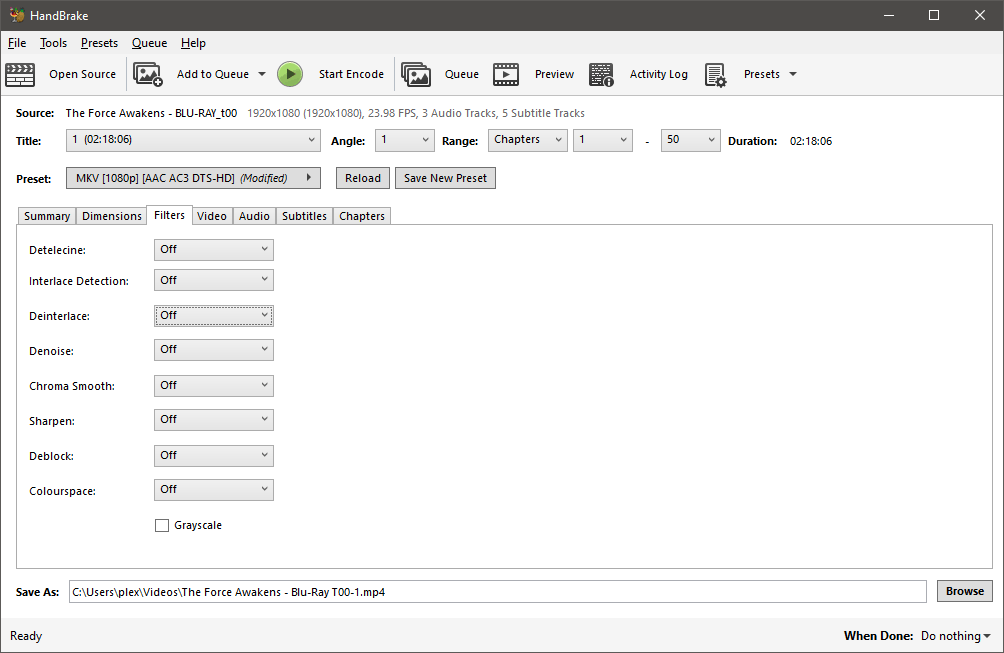
Handbrake Filters tab settings - On the Video tab, set the following:
Video tab settings Settings Value Notes Video Encoder H.264 (x264) This setting is used instead of H.265 (x265) because most, if not all, streaming devices support H.264. Framerate (FPS) 23.976 Most Blu-rays have a native framerate of 23.976. If you are unsure, you can use the MediaInfo application to view the details of the video file as it will display the framerate. An alternative is to select 30 and check the Peak Framerate checkbox. Constant Quality 21 Use Constant Quality over Avg. Bitrate. A value of RF:21 is a good starting point. For videos that contain more grain, you may want to move the slider to the left to get higher compression (lower quality) if the final video file's bitrate is too high. Encoder Preset Slow Encoder Tune Film Encoder Profile High Encoder Level 4.0 Advanced Options Leave blank 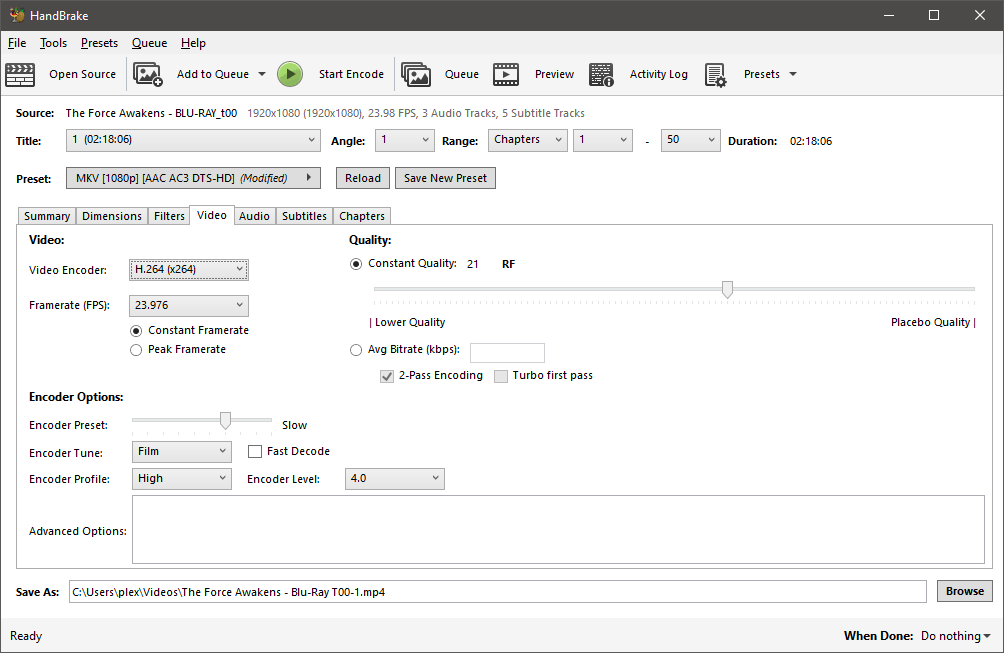
Handbrake Video tab settings - The Audio tab is where you set the audio tracks that are included in the video file. We will include three audio tracks - AAC, AC3, and the original HD track. To add a track, click the Tracks dropdown and select "Add New Track". Do this until three audio tracks are displayed. Always select the highest quality track as the basis for all the other audio tracks. Use the following audio settings:
Audio tab settings Settings Value Notes Codec 1st Track: AAC (avcodec)
2nd Track: AC3
3rd Track: PassthruFor the Passthru, select the passthru value that matches your master audio selection. In my example, I selected the DTS-HD MA stream, so I selected the DTS-HD Passthru option. Bitrate 1st Track: 160
2nd Track: 640
3rd Track: N/AThis setting is used instead of H.265 (x265) because most, if not all, streaming devices support H.264. Mixdown 1st Track: Stereo
2nd Track: None
3rd Track: N/ASamplerate 1st Track: Auto
2nd Track: Auto
3rd Track: N/AThis option can be displayed by clicking the arrow button to the right of the track. DRC 1st Track: 1 to 1.5 for an AC3 audio track, 2 to 2.5 for a DTS audio track
2nd Track: 0
3rd Track: N/AThis option can be displayed by clicking the arrow button to the right of the track. Gain 1st Track: 2 for AC3 and 3 for DTS
2nd Track: 0
3rd Track: N/AThis option can be displayed by clicking the arrow button to the right of the track. 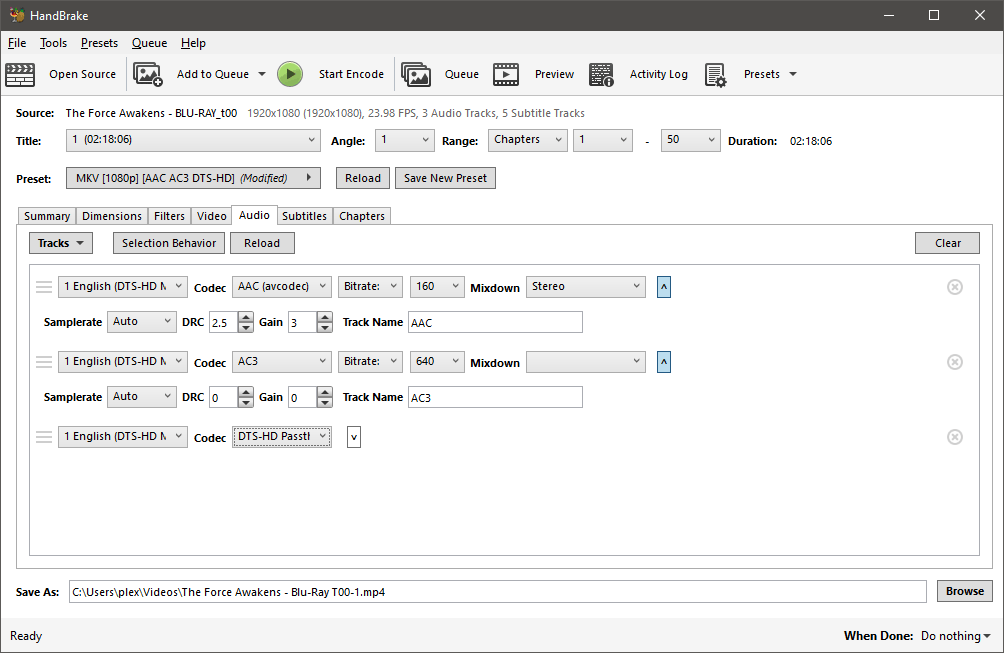
Handbrake Audio tab settings - On the Subtitles tab, set the following:
Subtitles tab settings Settings Value Notes Source Foreign Audio Scan Forced Only Unchecked Burn In Checked Default Unchecked 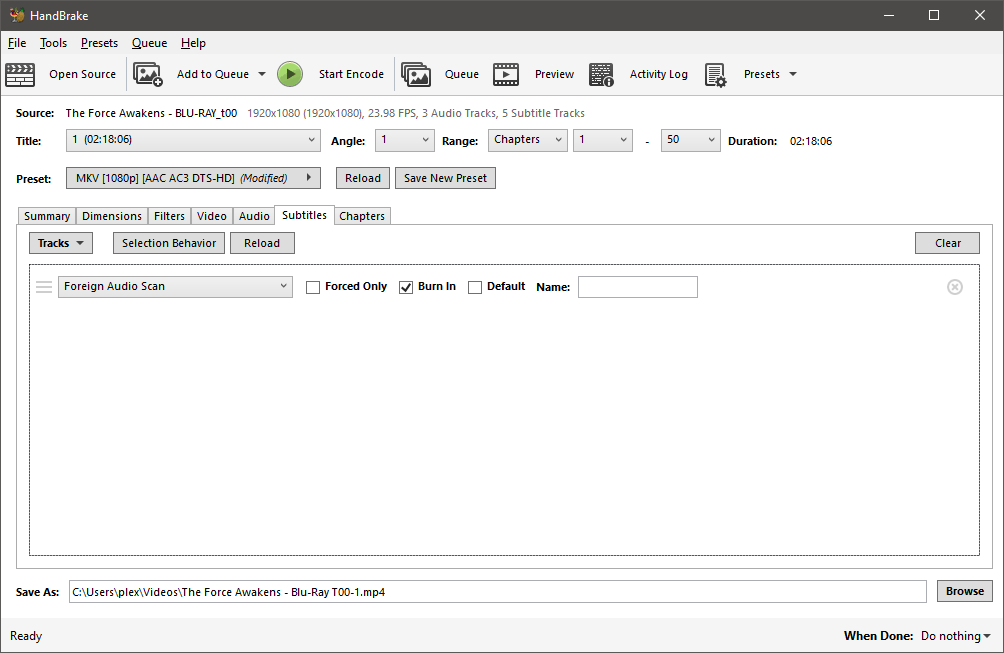
Handbrake Subtitles tab settings - On the Chapters tab, set the following:
Chapters tab settings Settings Value Notes Create chapter markers Checked 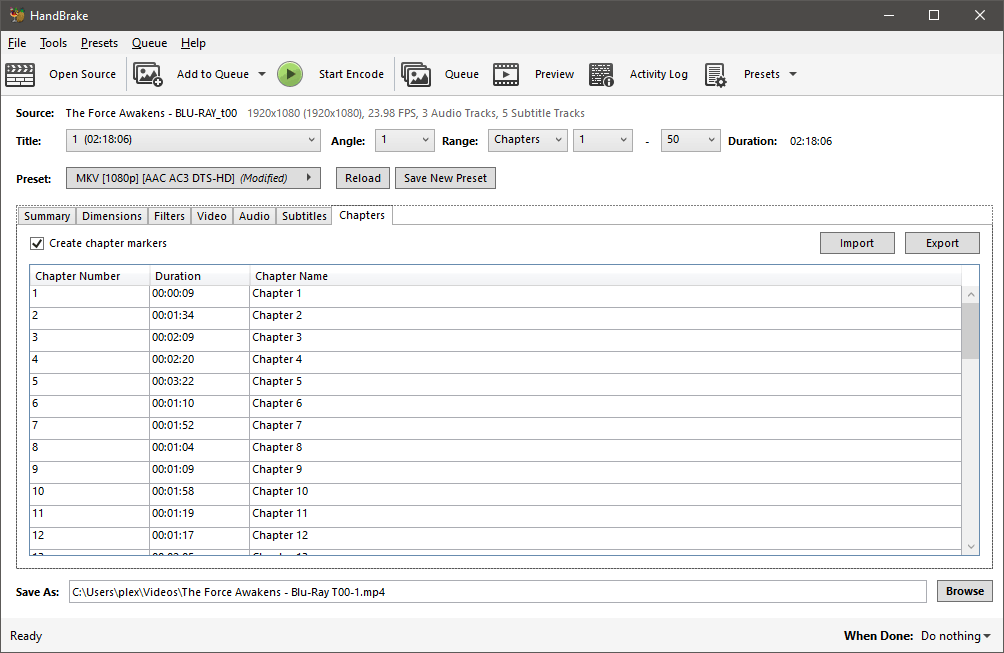
Handbrake Chapters tab settings - In the Save As field on the bottom, set the location and name of your video file. For information on where to name and store your media files for Plex, refer to the Movie Naming Conventions or TV Show Naming Conventions articles.
- Click the Start Encode button in the toolbar to begin encoding your movie file. Depending on your system, it could take several hours to complete.
Once all the tabs have been configured, you may want to save these settings as a preset to make it easier to use the same settings for future Blu-ray ripping. You can do this by clicking the Save New Preset button just above the tabs.
After Handbrake has finished encoding the video file, it will be much smaller than the original, and can then be streamed from your Plex Media server. The file will still be high-quality, but may still be too large to stream to some devices, such as over the Internet, or mobile/older devices. In that case, you may want to look at optimizing your video file to avoid transcoding to such devices.